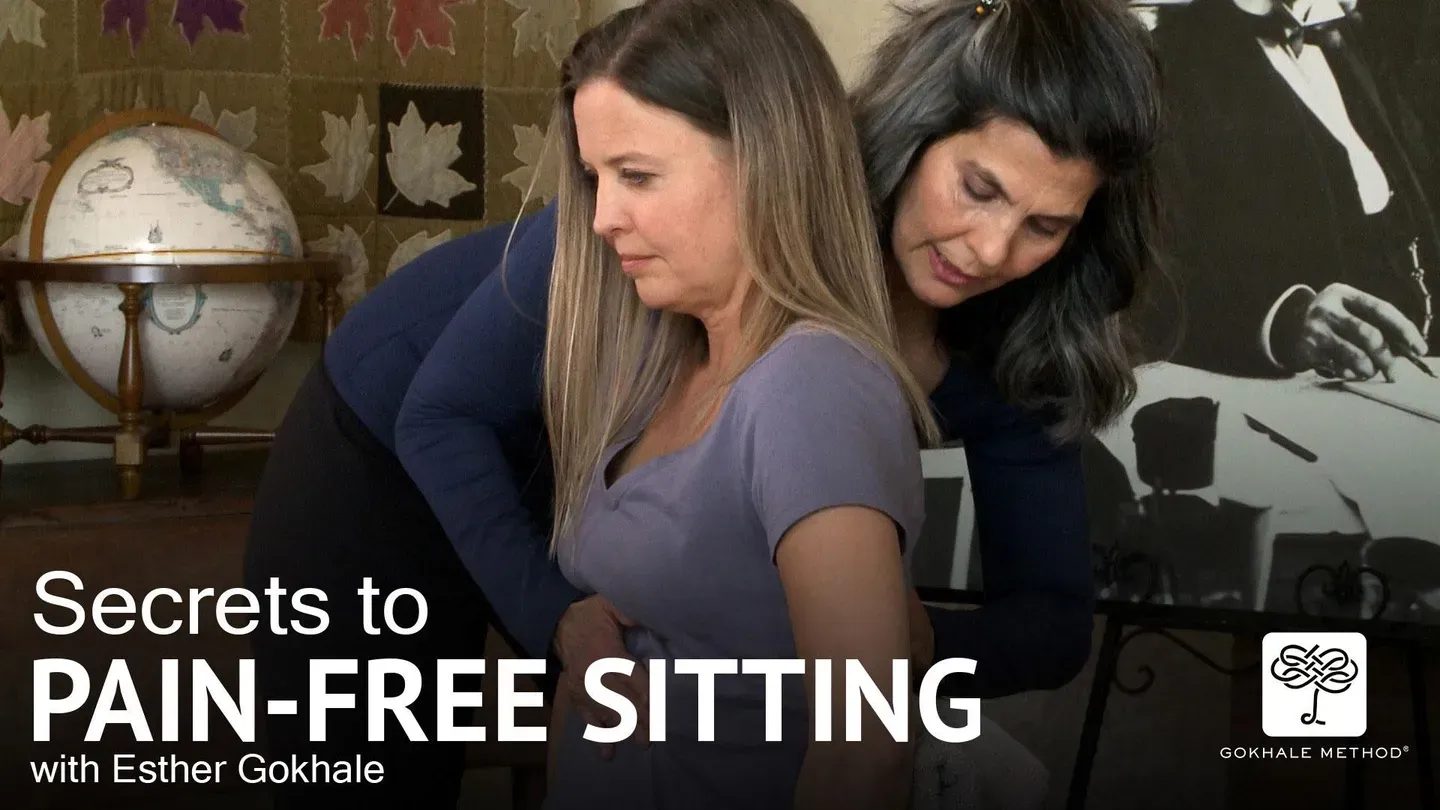
Secrets To Pain-Free Sitting With Esther Gokhale
Special | 38m 40sVideo has Closed Captions
Viewers learn how to heal their backs as they sit.
Sitting has gathered a negative reputation in recent decades. But if done skillfully, in moderation, and punctuated with exercise breaks, sitting can be comfortable, restful, and even therapeutic. In this special, viewers learn how to heal their backs as they sit by using gentle traction to elongate their backs and breathing to naturally massage their spines.
Secrets To Pain-Free Sitting With Esther Gokhale is presented by your local public television station.
Distributed nationally by American Public Television
Secrets To Pain-Free Sitting With Esther Gokhale
Special | 38m 40sVideo has Closed Captions
Sitting has gathered a negative reputation in recent decades. But if done skillfully, in moderation, and punctuated with exercise breaks, sitting can be comfortable, restful, and even therapeutic. In this special, viewers learn how to heal their backs as they sit by using gentle traction to elongate their backs and breathing to naturally massage their spines.
How to Watch Secrets To Pain-Free Sitting With Esther Gokhale
Secrets To Pain-Free Sitting With Esther Gokhale is available to stream on pbs.org and the free PBS App, available on iPhone, Apple TV, Android TV, Android smartphones, Amazon Fire TV, Amazon Fire Tablet, Roku, Samsung Smart TV, and Vizio.
♪♪ Esther Gokhale: Hi, I'm Esther Gokhale.
I'm an expert in back pain and posture, and today I'm going to teach you how to sit well in ways that are natural, super comfortable, and even therapeutic.
I'll teach you techniques that change sitting from something bad for you into something good for you, from something that hurts you into something that heals you.
We're going to challenge some notions like that sitting is the new smoking.
We're also going to challenge notions like that it's normal to have disc degeneration, arthritic changes in our vertebrae, and back pain by the time we're middle-aged.
We're going to learn to get a lot more enjoyment rather than grief from our bodies.
Here we go.
Esther: An excellent first step to improving your posture is stretch-sitting.
Stretch-sitting puts your back in gentle traction.
It stretches the long muscles of your back, your erector spinae muscles and resets them to a longer baseline length.
Stretch-sitting also decompresses the spinal discs in the lower back, allowing them to hydrate and repair themselves; and it gives your spinal nerves more room, which addresses the root cause of a lot of back pain and inflammation.
What you need is a backrest, something that is going to meet you mid-back, and it needs to have some friction on it.
You could use something like a towel, especially if you have a chair made of fabric.
That way it'll hold.
But you could also use something specifically made for this purpose like the nubs in the Stretchsit cushion that we made or on this chair that I designed.
So you begin by putting your towel or Stretchsit element right behind your mid-back and then you put your bottom well back in the chair.
A little bit more back than that, Susan.
Okay.
And now you're going to hinge away from the backrest just a little bit.
You don't have to clear very much, just a little.
And now we're going to do two techniques that elongate your back.
So the first technique, you put your fists on your ribcage.
You want to feel the bone there and then you gently nudge the ribcage in and down, and what that does is it takes out any arch you have in the lower back.
And then you do the next technique for further lengthening your back.
You use your hands somewhere on the chair.
You can push on the seat pan, or you can push on the backrest or the transfers bars or armrests if you have them, and then you gently push the top away from the bottom.
What you want to do is maintain the forward cant, and then you hinge back from the hip joint until you find the towel or the nubs of the cushion or the chair.
And once you've attached yourself there, you totally relax.
And if you succeeded you will feel a stretch in your back, some traction in your lower back, and that's a good sign that you have put your back in a healthy, elongated position.
Very, very therapeutic.
So let's do that again.
We're going to set the bottom back in the chair and then you're going to hinge away just a little bit, then you're going to gently push the nubs forward.
Dennis, be careful not to send your head additionally forward.
It's going to come forward a little bit, but you don't want to then push forward more.
Okay.
Now grab the bars or some part of the chair, push the top of you away from the bottom of you.
Hinge back.
Don't open up the forward cant until you've reached the nubs or the towel.
So you're staying curved forward to maintaining that extra length.
Yeah, it's very common for us to think about good posture as sticking out the chest.
Yeah, this is what we've been trained to do.
And now you want to stay with this forward cant so that the back remains elongated.
You're slanting back a little much, Eric.
So if you stand up, let's fix this chair.
Most chairs need some kind of engineering, and in this case it would do well to have a little bit more support under the top of the cushion so that you can see how this chair is more vertical now.
So you're going to sit and repeat.
Hinge forward, curve the ribcage forward, additionally lengthen the back, find the nubs.
It's like you're a picture hanging from the wall, and now you can feel that you've got this boost, you've got this stretch.
Good?
And you're more vertical.
Nice.
So there's a lot of benefit to stretch-sitting because your erector spinae muscles are getting reset, your discs have a chance of rehydrating.
After the age of 7, human discs don't get any blood supply so the only way they can repair themselves is by being decompressed.
They suction in moisture and building blocks, repair themselves; and it even benefits the bones and the nerves exiting between the vertebrae.
So this is something--anytime there is a backrest, it's like a low-hanging juicy fruit.
You want to pick it.
Huh?
Very little effort, lots of benefit.
♪♪ Esther: Now let's improve our shoulder position as we stretch-sit.
Many of us slump our upper bodies, and a common way we address this slumping is by pulling the shoulders back, which doesn't last, and that's just as well because this is not a healthy way to fix this problem.
It overuses your rhomboids, and it makes their attachments on the spine sore.
Another common way is for people to arch their backs and now they've just added in a second problem.
So you don't want to do that either.
Much better way is to do a shoulder roll.
So you start with one shoulder at a time.
You go a little forward, you go moderate amount up and you go a whole lot back, and you relax.
Can imagine that you have a kind of gear mechanism in your shoulder joint and it's as though you are ratcheting the soft tissue of the shoulders back a notch or two.
Little forward, moderate amount up, a lot back and you're totally relaxed, and you're trying to isolate this movement to the shoulder.
You want to be careful that you don't stick out your chest as your shoulder goes back.
Chest, the shoulders move back.
All right, let's do that together.
One shoulder at a time a little forward, moderate amount up, back, back, back a bunch.
Dennis, be careful you don't twist your body.
Totally relax your shoulder into its new position, which is actually an old position.
You used to be there when you were 2 years old.
Do the other shoulder.
Little forward, moderate amount up, a lot back, and you totally relax.
Now your breathing is improved, your circulation to and from the arms is improved, and you're no longer working your way into an increasingly hunched architecture.
♪♪ Esther: Now it's time to lengthen our neck.
A healthy human neck is a lot more vertical than we're used to seeing in modern times.
There are several ways to get our head and neck back to where they belong.
You could use your hands to grow--grasp one or two clumps of hair and gently pull back and up.
So there are two things happening here.
This head is getting rotated and your skull is gliding back.
Like you could think of the head as a car parked out on the driveway, maybe it's out on the street, and you want to back it up into its garage.
So let's do that together.
Go ahead and grasp your hair.
Nice.
And the more you relax your neck, the better this works.
Nice job.
Okay.
If you don't have much hair, then it actually works better to cradle the head with the hands and push in the same direction back and up with a relaxed neck.
Very, very nice.
You could also imagine that you have a helium balloon in your head and you're scouting around for little tensions in the neck to release and that will let your head drift up a little bit, or you could imagine that you have a weight on your head and now you're pushing up against that weight.
So any of these techniques will help you get a longer, healthier neck where the discs, the nerves, and the bones all have more room.
Esther: Let's review.
Use an appropriate support, whether it's a Stretchsit cushion or a towel mid-back level, and then you place your bottom well back in the chair.
Now you hinge away from the backrest, pivot the ribcage forward, and then push off the chair's backrest or armrest or seat pan and further elongate your spine; and now hinge back, find the nubs or the towel, and relax.
And now you roll one shoulder forward a little, a moderate amount up, and a whole lot back one shoulder at a time; and then you elongate your neck and now you fully relax.
Esther: One way to understand what we've just done is to look at these two spines.
This one comes from a modern anatomy book and shows the S-shaped spine that our culture has come to believe is natural.
This one comes from an anatomy book published in 1911 and shows a very different spine, a J-shaped spine like a calligraphy J; and this is the shape that I teach, and it's the shape that you find in young children, in our ancestors, and in people in non-industrial cultures today.
And this one makes a whole lot more sense than does this one.
For example, you see that the intervertebral disk spaces are cylindrical here, which makes sense because these discs are cylindrical.
So that's a good fit.
Here, the cylindrical discs are being squished into wedge-shaped spaces.
If this is what we're doing all day because we're being asked to sit up straight or because our ergonomic chairs have exaggerated lumbar support, no wonder we have so much degenerative disc disease and dysfunction.
This arrangement also makes sense from the point of view of stacking of the bones.
Here, they are well-stacked.
Here, they are edge-wise compressed, which creates arthritic changes at the edges.
What we've done with stretch-sitting is we've taken this shape, or C-shape if that's what you're beginning with, to more of a J shape, and all of the long back muscles from the point of attachment down are getting a sustained stretch.
You're restoring normal architecture to your bones and your discs.
So now we understand the mechanics and the benefits of stretch-sitting.
People often ask us about sitting in different kinds of chairs.
Let's take a look at how to do this.
Esther: Sitting in a recliner gives you the possibility of relaxing, taking some pressure off your spinal discs and nerves.
The problem is most recliners have really awkward shapes.
They support a C shape or maybe an S shape.
So you need to fix them, and the way to fix is to use little folded towels or cushions or Stretchsit cushion on the face of it for extra elongation; then you go through your stretch-sitting motions: lean back, put your feet up, and now you are able to rest and relax without having to lie on your bed.
Esther: If you would like to sit in a sofa, you have to navigate the excessive depth that most sofas have.
So you place a cushion behind you and then facing outwards the Stretchsit cushion with the nubs facing out, or you put a folded towel behind you.
Put your bottom well back in the chair, place the towel behind your mid-back, and then go through the motions of stretch-sitting.
Curve forward with your ribcage, elongate your torso, hook it to the back, shoulder roll on each side, elongate your neck, and relax.
Esther: Stretch-sitting is great for riding in a car.
The extra length decompresses the spinal discs and the spinal nerves.
Most car seats are problematic in several ways.
The head restraints force the head forward.
The bolsters, vestigial from racing car design, push the shoulders forward.
The contours of most car seats are S-shaped and force the spine to take the shape.
A support like a Stretchsit cushion or a towel can address these challenges.
With the extra padding behind the head is no longer forced forward by the head restraint, the shoulders get more clearance to be back relative to the body; and the traction help support an elongated J spine, good for withstanding the vibrations of the ride.
Now you're ready for a pain-free ride in your car.
♪♪ Esther: Stretch-sitting needs a backrest, and you're not always going to have a backrest.
In this case, stack-sitting is the answer.
For stack-sitting, the position of the pelvis is all important.
In upright sitting, the pelvis serves as the foundation for the rest of the spine.
If you situate your pelvis well, you can be upright and relaxed.
If you tuck your pelvis, then you have two options and they're both bad.
You can be relaxed and you will be slumped, or you can be upright but it's going to take tension in the lower back; and both of these do harm.
So you might wonder why do people tuck their pelvis, and I blame, among other things, our kid furniture.
Day one coming home from the hospital, we put our babies in this kind of car seat and then later umbrella strollers and they learn to sit with the tucked pelvis.
Then they take this into school and then their workforce when they have jobs, and this becomes their template for sitting.
To situate the pelvis well, and this position the technical name is anteversion, it helps to have a wedge.
My favorite wedges are a folded woolen blanket and a fleece.
In the chair that I designed, I built a wedge in in the middle part, right around here.
If you don't have a wedge, one thing you can almost always do is to perch on the front edge of whatever surface you're sitting on and that will allow you to be upright and relaxed.
All right, let's do it.
So start by standing right in front of your chair, feet slightly turned out, and choose a distance from the chair so that when you squat down your sits bones are going to perch on the edge of your wedge.
And off you go.
All right.
So that's a little too high up on the wedge.
Go ahead and go forward a bit more so that you're really perched on the front edge of the wedge and the wedge is actually tipping your pelvis forward.
Nice.
Dennis, your knees look a little high compared to your seat and that tends to tuck you.
So raise the chair and also lower your knees by setting your legs out or under.
Maybe one out, one under.
That looks better.
That allows your pelvis to navigate any tightness you might have in the glutes.
So there are several ways that you can improve your pelvic anteversion a little bit.
One way is to lean forward after you're sitting, and then lift your bottom a little off the chair.
Maybe grab your sits bones with your hands, pull on them as you sit yourselves back down.
Nice.
Another thing you could do is lift one bottom at a time and grab your flesh and pull the flesh back.
That's good.
Yeah.
Or another trick is to scooch your bones forward a little bit and keep--leave your flesh wedged behind.
So, Eric, scooching, scooching, scooching.
Your flesh gets wedged behind and that increases the pelvic anteversion a little bit.
All right, we're ready for shoulder rolls.
Very similar to what we did in stretch-sitting, you take one shoulder a little forward, a moderate amount up, and a whole lot back.
This time you have to watch your ribcage position a bit more.
Because with stretch-sitting you had the chair supporting you, now there's nothing supporting you.
So you have to remember as you do your shoulder roll; a little forward, up, back.
Don't take the whole chest along, just isolate this movement to the shoulder.
Very nice.
And you'll notice that your hands are much closer into your body than they were because now your shoulders are further back.
So now we're ready to work with our necks.
So choose your favorite technique.
Grasp your hair or your head, or push on the base of your skull.
Imagine a helium balloon or a weight that you're pushing up against.
Very nice.
You might want to do a little shoulder roll again and relax.
So now we're going to check our spinal grooves.
You want to run your fingertips lightly over your lower back from side to side and up and down, and what you'd like to find is a subtle groove with even depth throughout the lumbar spine.
To get there, place your fists lightly on the lower border of your ribcage and then gently push in and down.
Now use your fingertips to check what is happening in the grooves on your lumbar spine.
You'd like to find that this action reduces the curve there, if you started with the sway, and what you're using is your internal abdominal obliques.
It's your second deepest layer of abdominal muscles, and they pull the ribcage in and down in the front.
The mind muscle connection is not very strong with these muscles.
That's why we're using our fists.
And as you push in and down, the back border of the ribcage lifts up and out.
And since the back of the ribs are attached to the vertebrae, they pull the vertebrae into a longer, flatter alignment.
Now that your back is in a better, upright, relaxed position, your spine can rise and fall with your breathing.
See if you can feel that.
When you inhale, your back lengthens, and when you exhale your back settles back down to its baseline length.
Breathing in you get length, breathing out you settle.
Very nice.
Now you've put together all the components of stack-sitting.
You may be surprised by how comfortable and easy this way of sitting is.
No more tensing to be upright.
No more finding yourself in a slump when you relax.
So to understand what's happening in the mechanics of your spine, we're going to go back to our J spine and S spine illustrations.
When you set your pelvis in this anteverted manner, the vertebrae can stack more upright and it lets the long muscles of the back remain relaxed, which is why the breathing is able to lift and lower the spine, and it's also what makes stack-sitting easy and sustainable.
Esther: So let's review.
You want to place your sits bones on the edge of whatever wedge you're using, and then you let your legs, your thigh bones angled down so that you can rest your pelvis comfortably and stably.
Every wedge needs a little bit of wiggle and adjustment, and so take your time making sure that the pelvis is stable.
Pull your flesh back if you need to and then give it some time, and now open your shoulders little forward, up, back one at a time.
Little forward, up, back.
Totally relax.
Now elongate the back of your neck.
Now feel for an even groove over your spine.
Anchor your ribcage, if you need to, and feel for the movement in your spine as you breathe.
You breathe in, the spine gets a little long.
When you breathe out, it settles back down.
And now relax and enjoy.
♪♪ Esther: This professional tool is used by most of our Gokhale Method teachers.
So SpineTracker consists of five sensors that go on the lumbar spine that connect wirelessly with a tablet or an iPhone.
So if you look at these renditions you can see that Dennis' shape shows a characteristic C shape of someone who is relaxed and somewhat slumped, and Susan's shape shows the characteristic S shape of someone who is trying to have good posture but in a misguided way.
So when they stretch-sit, go ahead and do that, you will see that those C and S shapes turn into J spines, somewhat reclined because they're leaning back against their backrest.
And I'm going to calibrate now to mark these as healthy shapes.
There we go.
And we're also going to take a look at a simulation of what's happening on the inside of their back.
So that is very close to what's really happening to their discs and their vertebrae.
Now, when they come off the backrests, we're going to see that they return to their problematic S shape and C shape.
So eventually, over time, they will change.
With repeat stretch-sitting, these baseline shapes will become more sustainable.
It'll become their new spinal shapes.
This is very achievable over time.
Most students can see very significant changes, including pain reduction, in a matter of days or weeks.
SpineTracker is a professional device.
You need an expert like a Gokhale Method teacher to put the sensors on your back and to mark a target shape.
To show you the shape of my back as I stack-sit, I've got my five sensor SpineTracker on me and we are seeing that my spine is J-shaped.
So this J spine is a far cry from the shape I had when I began this work.
I used to arch my back, and you can see that in this MRI I had an S-shaped spine.
Not enough curve at L5-S1, too much curve higher up in the lumbar spine; and you can see that I severely herniated my L5-S1 disc.
By habitual tucking I had forced this wedge-shaped disc into a cylindrical space, and by my mid-20s I'd managed to wear out all the fibrous layers of that disc and the soft central part herniated backwards onto my spinal cord in the L5-S1 route.
The radiologist was impressed.
You can see he inked in starburst marks and said that this was the largest herniation he had seen all year.
On my end, torture.
Felt like an icepick was in my buttock and the pain radiated down to my toes.
I had--how it started in the ninth month of pregnancy with my--and I couldn't carry my newborn baby.
I couldn't carry a cooking pot without feeling twinges, and I didn't want to take pain meds because I was nursing my baby and what that meant is I couldn't sleep for more than 2-hour stretches and have to walk around the block to get rid of spasm and then be able to sleep again a little bit.
So I think the trauma that this caused to actually cast a shadow far beyond the physical disability, and I think that lots of modern households have these kind of wrenching stories throughout the world.
Esther: Let's go back to stack-sitting.
Stack-sitting applies in many contexts.
For example, when you're sitting on a park bench, be sure that the front edge of your sits bones perch on the front edge of the bench before you go through your stack-sitting ritual and totally relax.
Esther: If you are at a picnic or on the beach or have very young children, you will need to sit on the ground sometimes.
This is challenging or even impossible for most people from modern cultures to do with good posture.
I recommend having a selection of props like zafus, or bolsters, or meditation benches, or short stools with an easy reach.
These props allow your thighs to slope down diminishing the need for an acute angle at the hip joint, an angle that your joint might not be capable of.
If you need a prop, there is no shame in that.
Esther: One big advantage that bar stools give you is that they're especially high.
This allows your knees to be far below your hips and makes it especially easy for your pelvis to tip forward and for you to be able to stack-sit successfully.
Esther: If you play an instrument, you will likely need to use a stool or bench.
Start with your feet facing out about hip width apart and squat your way down so that your sits bones perch on the front edge of your seat.
Now remain upright and relaxed.
Make sure you're not swaying your back, roll one shoulder open at a time, check on your neck, and you're ready to play.
There'll be times when you want to reach out, and you want to do this with your whole body moving as one unit from the hip joint.
Esther: Stack-sitting is very versatile.
Once you learn to stack-sit well, you can sit on just about any seat, including any bike seat.
You just have to be careful to tip your pelvis forward and perch your sits bones on the saddle, and then you can be upright and relaxed.
You do have to be careful to maintain your shoulders in a posterior position.
♪♪ Esther: No matter how well you sit, it's still important to take movement breaks and change positions.
An ideal movement break stimulates circulation, provides g-forces to your bones, and stretches and strengthens key muscles.
One muscle to check in on is the psoas muscle.
It runs from the front of your lumbar spine to the inside of your thigh bones, and when it's short it tends to pull your lumbar spine into a sway.
This risks degeneration in the discs, arthritic changes of the edges of the vertebrae, impingement of the spinal nerves, and back pain.
One stretch that can reset this muscle is the lunge.
So start with your feet hip width apart and then slide one leg back as you lean towards the floor.
If you're flexible enough, you can place your hands to the floor.
Dennis, I think you need to place your hands on your knee because that's--the upper back is rounding too much.
There.
Now your back is in much better alignment.
It's good.
Susan, if--you're swaying a little bit.
So see if you can align your back.
Give that more priority and lean forward a little bit.
And, Eric, you can choose to do some exercise alongside this or you could just rest your knee on the ground, your choice, and relax your toes so that they--your feet aren't strained.
And now repeat on the other side.
So switch sides.
Takes about 20 to 30 seconds for a muscle to relax.
Much better.
Much better, all of you.
Great.
Dennis, you can relax your toes under if you like.
And when 20 to 30 seconds are over, you can slowly make your way up.
Another way to stretch the psoas is with one of my favorite movement breaks: samba.
So let's move the chairs out of the way, make room, and here we go.
Right leg back and squeeze your buttock, step in place, and right foot back together.
Left back, step in place, together, pause.
Back, step, together.
Back, step, together.
Add a shoulder roll on the same side as the leg.
Nice.
And what's lovely about the samba is that you're doing several exercises in parallel.
Like you're stretching your psoas, you're toning your glutes, stretching the pecs, stretching the traps, strengthening the rhomboids, and patterning yourself for healthy walking.
We can step it up.
A little faster.
One, two, three.
♪♪ Esther: So you have learned two ways of making sitting from something bad for you into something good for you, from something that harms you into something that heals you.
Throw in a psoas stretch from time to time and maybe a samba break and now you have a fun way to have a very productive life without pain.
♪♪ ♪♪ ♪♪ ♪♪ ♪♪ ♪♪ ♪♪


Secrets To Pain-Free Sitting With Esther Gokhale is presented by your local public television station.
Distributed nationally by American Public Television